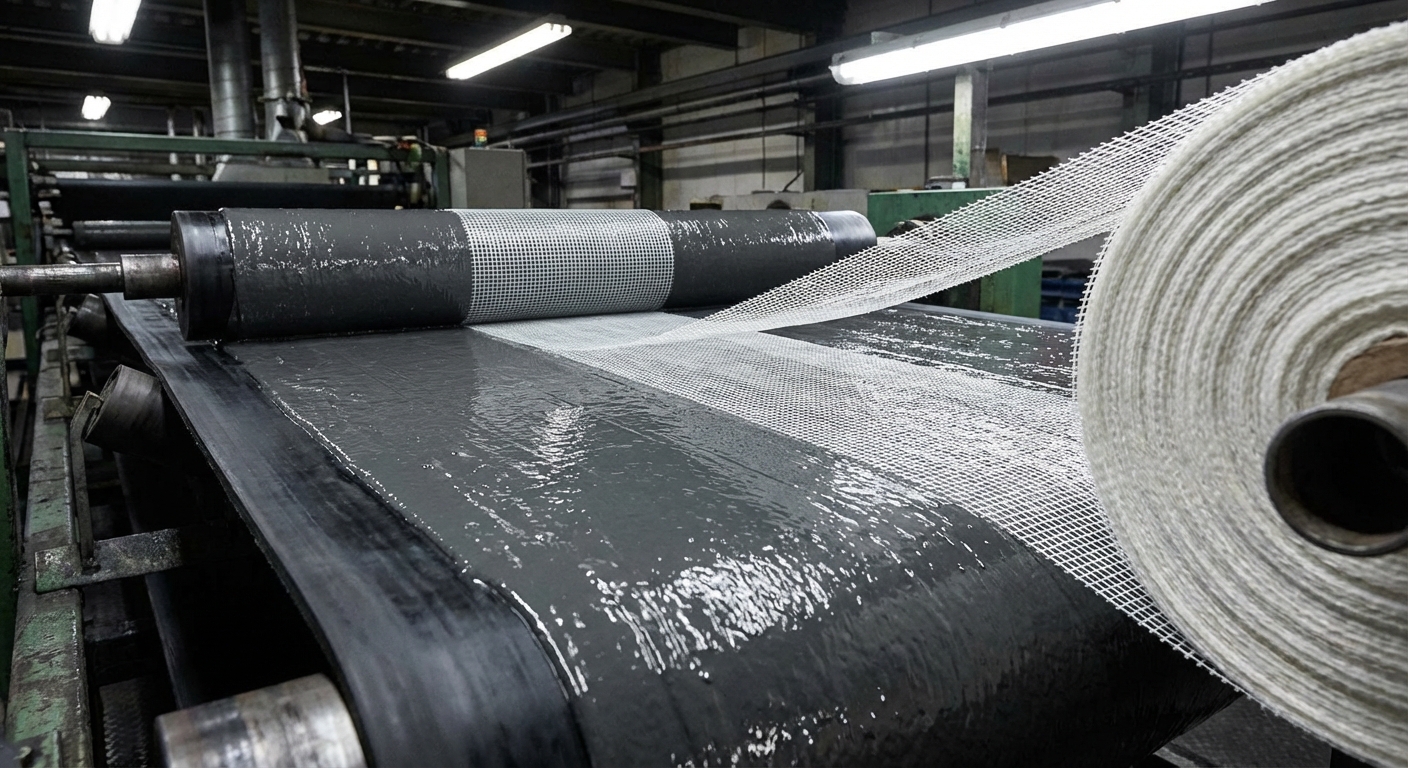
A rubber conveyor belt repair sidewall solution using elastomeric polymers enables fast, on-site repairs, reducing downtime, avoiding costly replacements, and restoring conveyor performance efficiently.
How do you start a rubber conveyor belt repair sidewall?
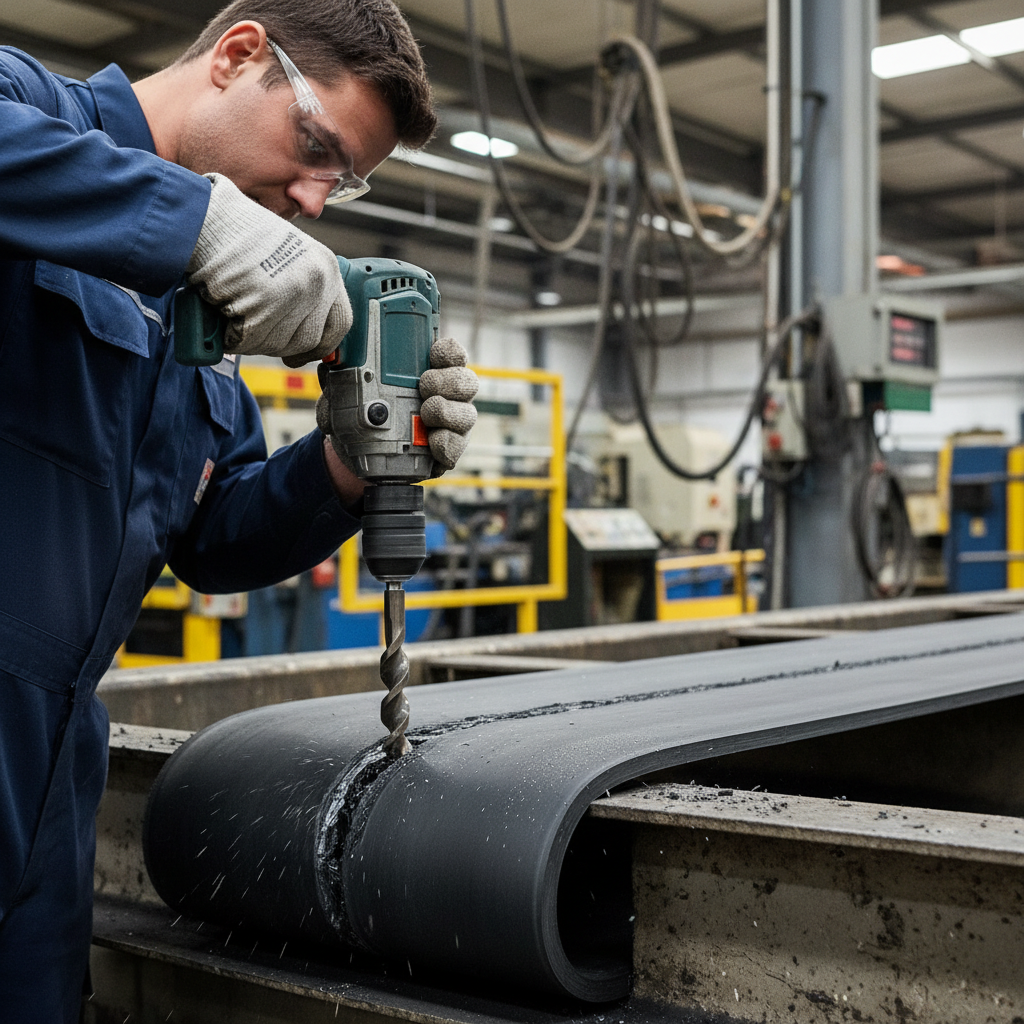
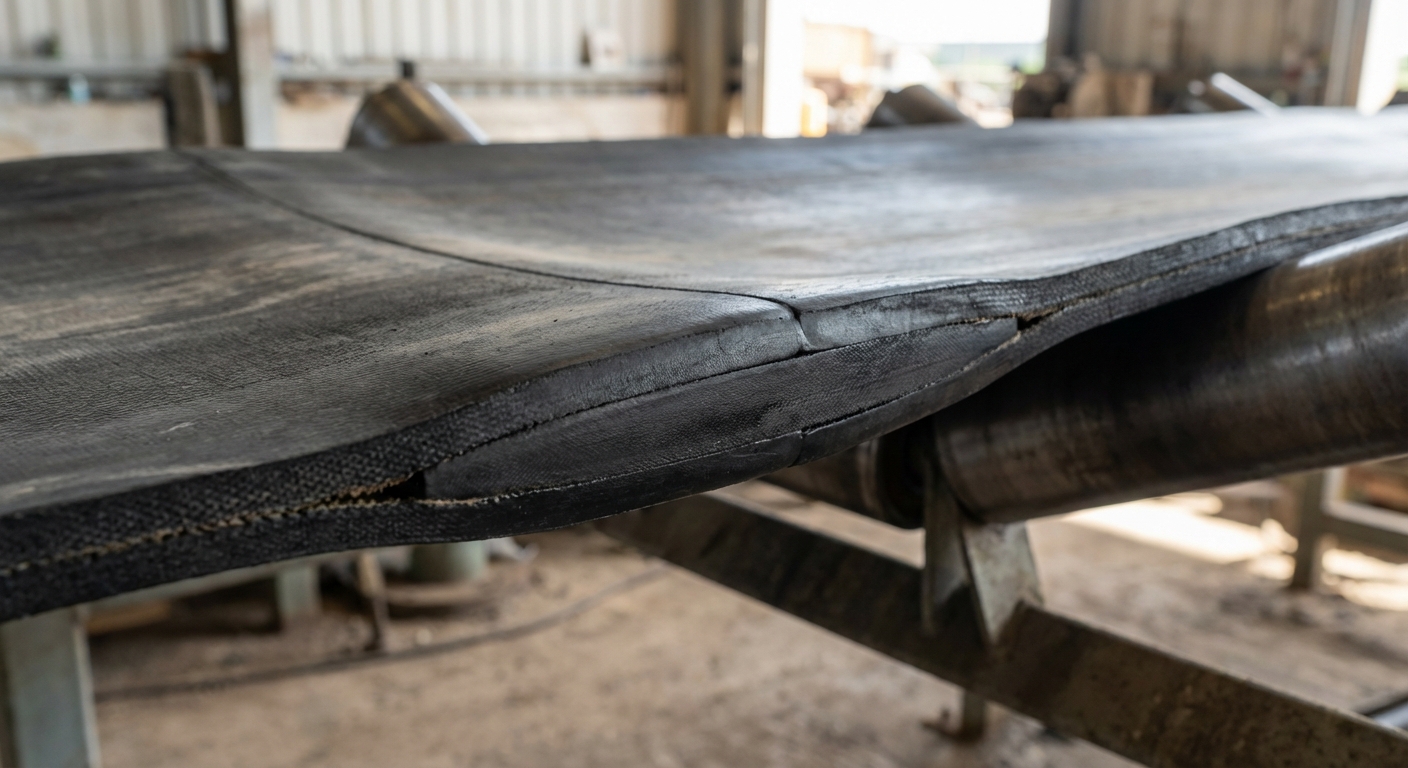
You begin a rubber conveyor belt repair sidewall by identifying the extent of the damage and drilling termination holes at the ends of any longitudinal tears. This critical step prevents the crack from propagating further under the tension of the drive pulleys.
Preparing the defect area
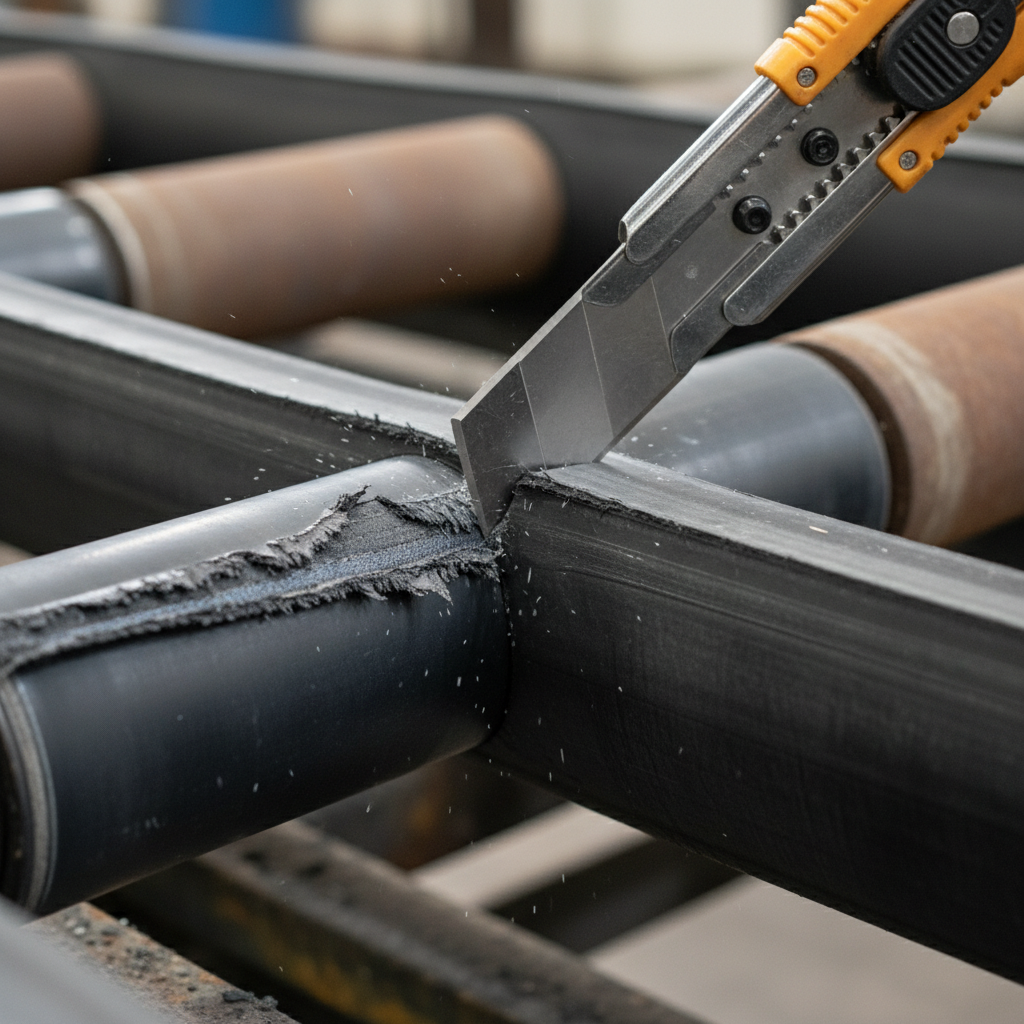
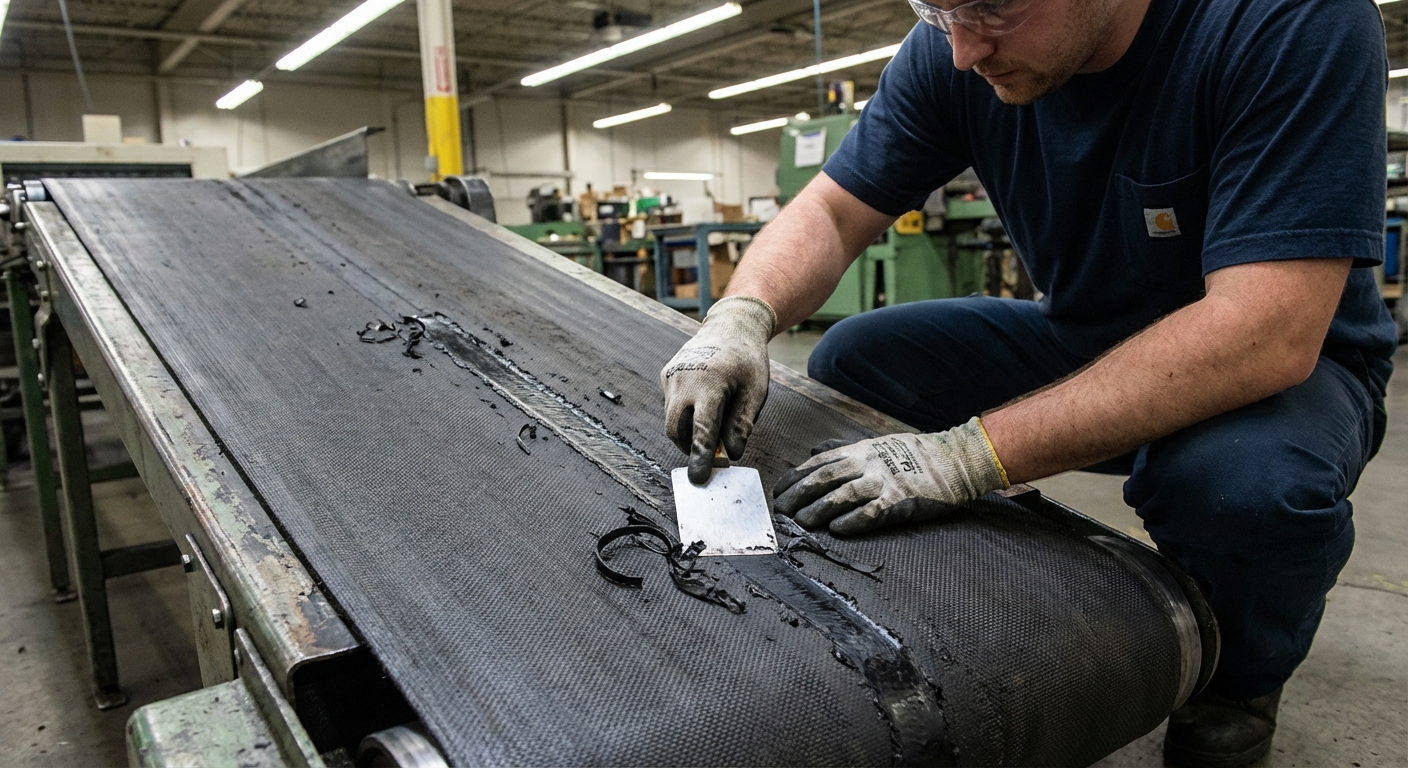
Look, proper preparation is the backbone of any polymer application. You must use a sharp knife to undercut the damaged rubber, ensuring you leave a sound, square edge for the polymer to bond against.
- Drill 1/4-inch holes at each tear end.
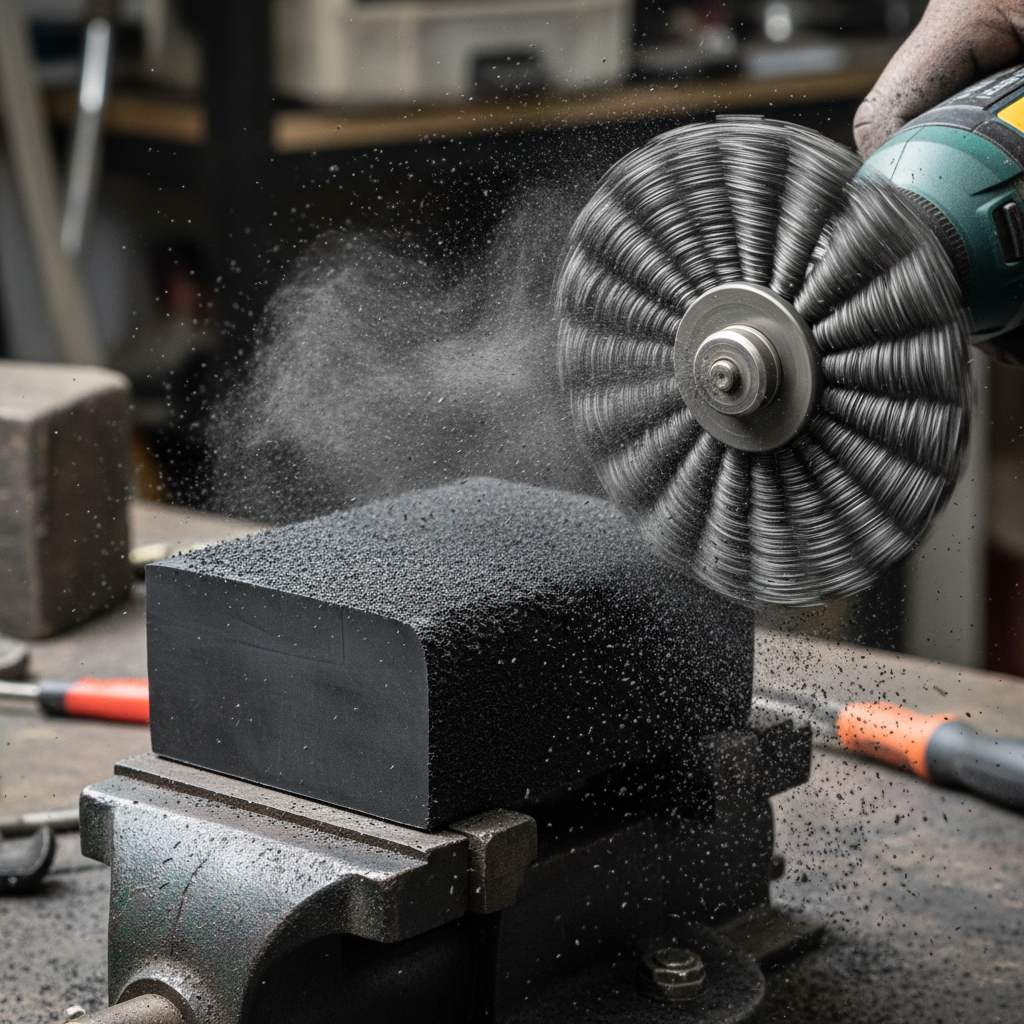
- Remove loose debris and frayed fabric.
- Ensure the area is completely dry.
The best part? This process requires only basic hand tools rather than heavy vulcanizing presses.
| Preparation Step | Tool Required | Purpose | |
|---|---|---|---|
| Tear Termination | Power Drill | Prevents crack growth | |
| Undercutting | Industrial Knife | Creates sound bonding edge | |
| Cleaning | Wire Brush | Removes surface contaminants |
Following these preparation protocols prevents premature failure of the repair under heavy load conditions.
Why is rubber conveyor belt repair sidewall vital for mining?
A prompt rubber conveyor belt repair sidewall is essential in mining to prevent ore and sharp minerals from penetrating the belt core and causing catastrophic failure. Without this intervention, moisture can seep into the internal fabric or steel cords, leading to internal corrosion.
Protecting the belt carcass
Believe it or not, the sidewall is the first line of defense for the belt’s structural integrity. When the outer rubber is compromised, the internal reinforcement layers are exposed to abrasive dust and chemical runoff.
- Seals the belt against moisture.
- Prevents ply separation.
- Resists chemical degradation.
Bottom line? Protecting the carcass extends the total service life of your high-value assets.
| Mining Risk | Impact | Polymer Solution | |
|---|---|---|---|
| Ore Penetration | Core Damage | Flexible Sealant | |
| Moisture Ingress | Corrosion | Waterproof Barrier | |
| Abrasive Dust | Surface Wear | High-Abrasion Cover |
Maintaining a sealed sidewall ensures the conveyor system maintains its rated tensile strength during 24/7 operations.
What is plaster casting in rubber conveyor belt repair sidewall?
Plaster casting in a rubber conveyor belt repair sidewall refers to a cold-molding technique where liquid elastomeric polymers are poured and leveled into a prepared cavity to restore the belt’s original profile. This method mimics the precision of a molded part but is performed directly on the conveyor frame in your facility.
How the casting process works
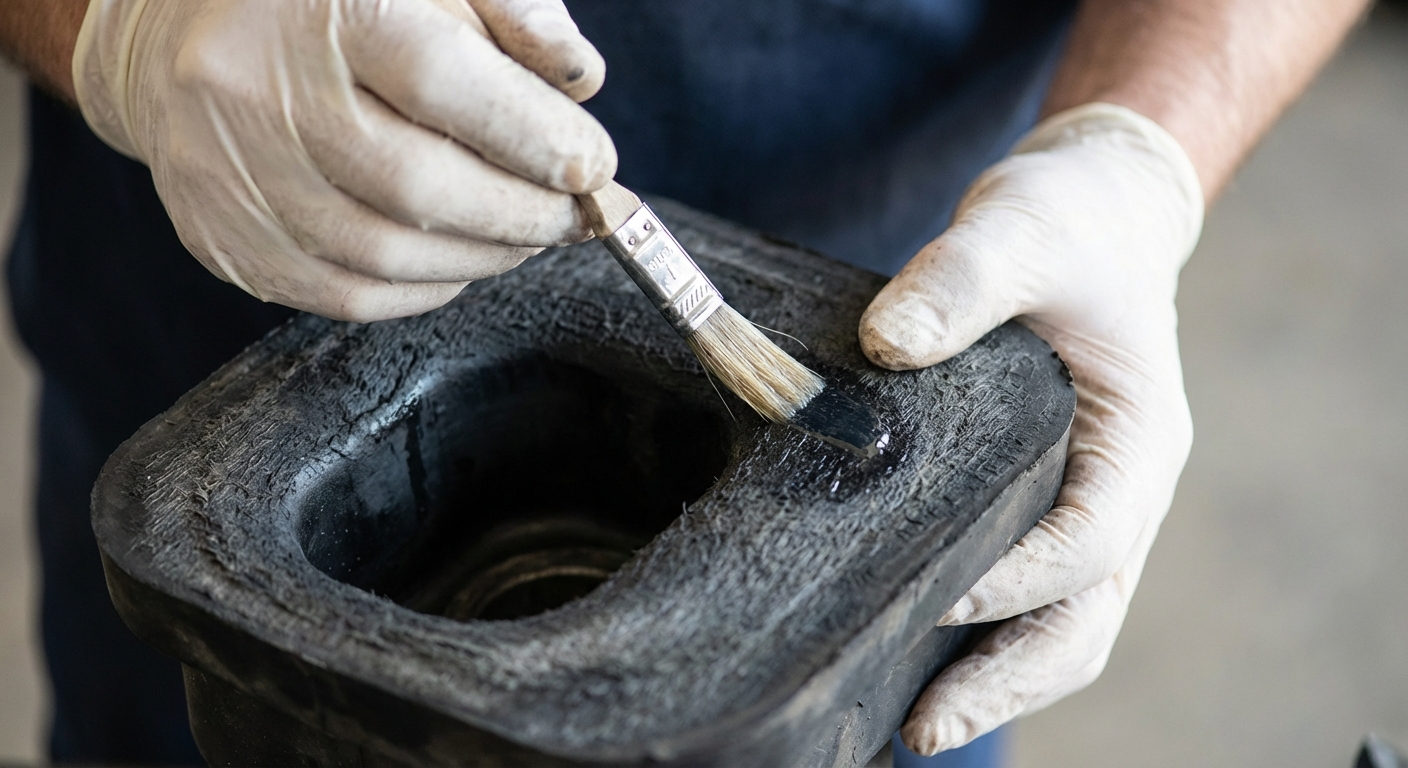
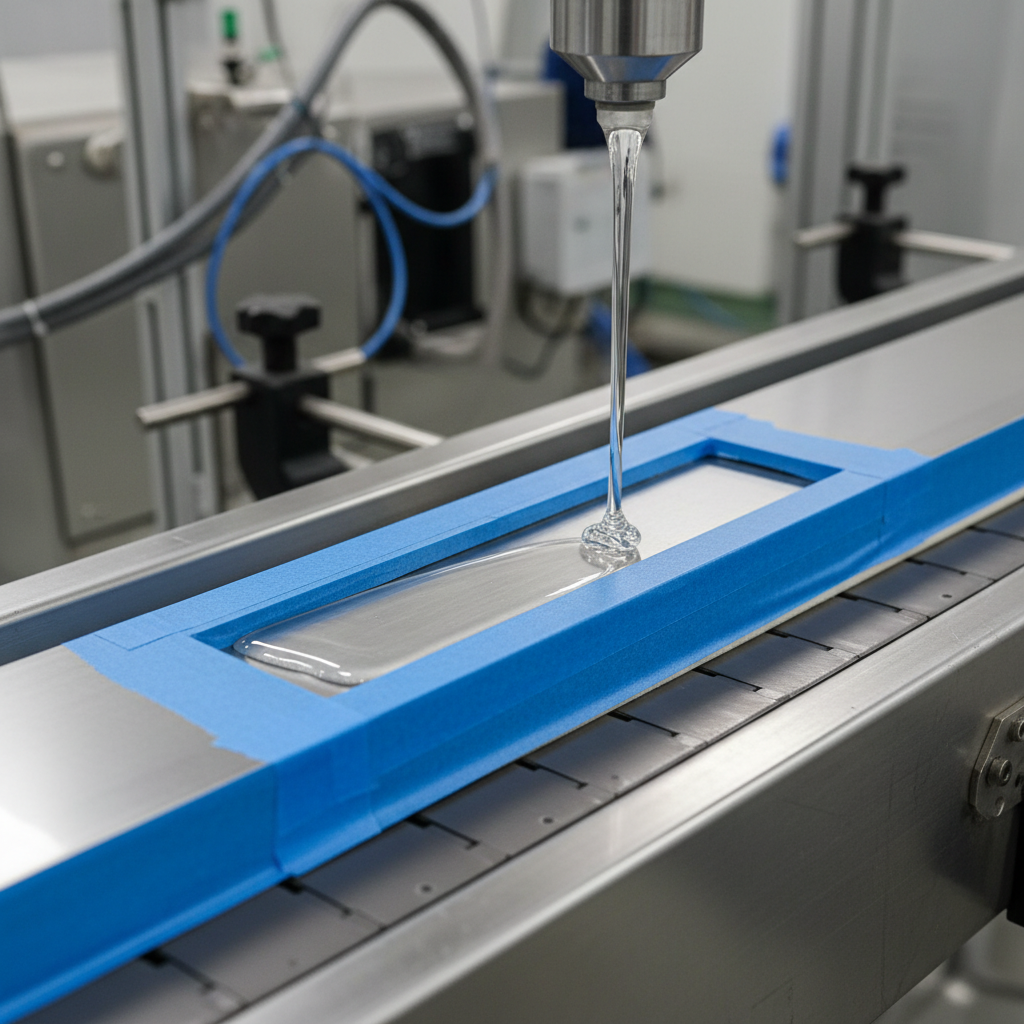
Listen, this isn’t about medical plaster; it’s about creating a perfect “cast” of the missing rubber. You use a specialized applicator to fill the void, ensuring the polymer flows into every crevice for a seamless finish.
- Rebuilds lost rubber volume.
- Matches the belt’s original thickness.
- Creates a smooth, flush surface.
Think about it: you are essentially manufacturing a new section of belt sidewall right on the conveyor.
| Casting Aspect | Technique | Benefit | |
|---|---|---|---|
| Void Filling | Liquid Pouring | 100% surface contact | |
| Profile Leveling | Spatula Finishing | Smooth belt tracking | |
| Depth Control | Layered Application | Consistent structural density |
Using casting techniques ensures the repaired area behaves identically to the surrounding rubber during pulley wrap.
When should you perform rubber conveyor belt repair sidewall?
You should execute a rubber conveyor belt repair sidewall the moment you detect surface gouges, fraying, or longitudinal tears during your weekly maintenance inspections. Catching these issues early prevents small nicks from becoming full-width rips that require belt replacement.
Identifying critical repair windows
The catch? If you wait until the belt is vibrating or dropping material, the damage may have already reached the tension members. Monitoring the sidewall during scheduled downtime allows for proactive repairs that take less than an hour.
- During scheduled shutdowns.
- Immediately after impact events.
- When fabric reinforcement is visible.
Wait, there’s more: performing repairs in-situ means you don’t have to wait for the belt to be tensioned down or removed.
| Damage Level | Action Required | Priority | |
|---|---|---|---|
| Surface Scratch | Monitor | Low | |
| Visible Fabric | Immediate Repair | High | |
| Through-Tear | Emergency Polymer Fix | Critical |
Immediate action on visible fabric prevents environmental elements from degrading the core structural layers of the belt.
How does polymer fix a rubber conveyor belt repair sidewall?
A high-performance polymer fixes a rubber conveyor belt repair sidewall by creating a chemical and mechanical bond with the existing rubber that is both flexible and impact-resistant. These cold-cure polyurethane materials are engineered to move with the belt as it travels over head and tail pulleys.
The science of elastomeric bonding
Here is the deal: the polymer is formulated to have a similar “Shore A” hardness to industrial rubber. This ensures the repair doesn’t become a hard spot that cracks or a soft spot that wears away too quickly.
- High tear and abrasion resistance.
- Excellent elongation properties.
- Permanent adhesion to rubber and fabric.
Check this out, the material actually absorbs the energy of falling ore, much like the original belt cover.
| Polymer Property | Performance Metric | Operational Benefit | |
|---|---|---|---|
| Elongation | >300% | Flexibility over pulleys | |
| Adhesion | High Peel Strength | No delamination | |
| Cure Type | Cold-Cure | No heat damage to belt |
Matching the polymer’s flexibility to the belt’s modulus ensures the repair survives millions of cycles through the drive system.
What tools aid rubber conveyor belt repair sidewall projects?
The primary tools required for a rubber conveyor belt repair sidewall project include a rotary wire brush for surface abrasion, a conditioning brush, and a professional polymer applicator. Unlike traditional vulcanizing, you do not need heavy heating elements, cooling water lines, or high-voltage power sources.
Essential application equipment
By now, you realize the simplicity of the kit. You only need a few portable items to achieve a factory-grade finish on a damaged section of belt.
- Rotary wire brush (roughing).
- Cleaning solvent and lint-free cloths.
- Polymer mixing paddle and applicator.
Here is the kicker: the entire kit can fit into a single handheld toolbox for easy transport to remote mine sites.
| Tool Category | Specific Item | Function | |
|---|---|---|---|
| Surface Prep | Wire Brush | Creates “woolly” finish | |
| Chemical Prep | Surface Conditioner | Enhances molecular bonding | |
| Finishing | Spatula/Applicator | Levels polymer flush |
Simple tooling reduces the logistical complexity of maintaining long-distance conveyor systems in rugged environments.
Can you simplify rubber conveyor belt repair sidewall steps?
You can simplify the rubber conveyor belt repair sidewall process by following a standardized “prep-prime-fill” workflow that eliminates unnecessary complexity. Most repairs can be completed in under ten steps, from initial cleaning to the final removal of masking tape.
The streamlined workflow
Believe it or not, efficiency is about the order of operations. By masking the area first and using quick-dry conditioners, you can reduce the “waiting” time significantly.
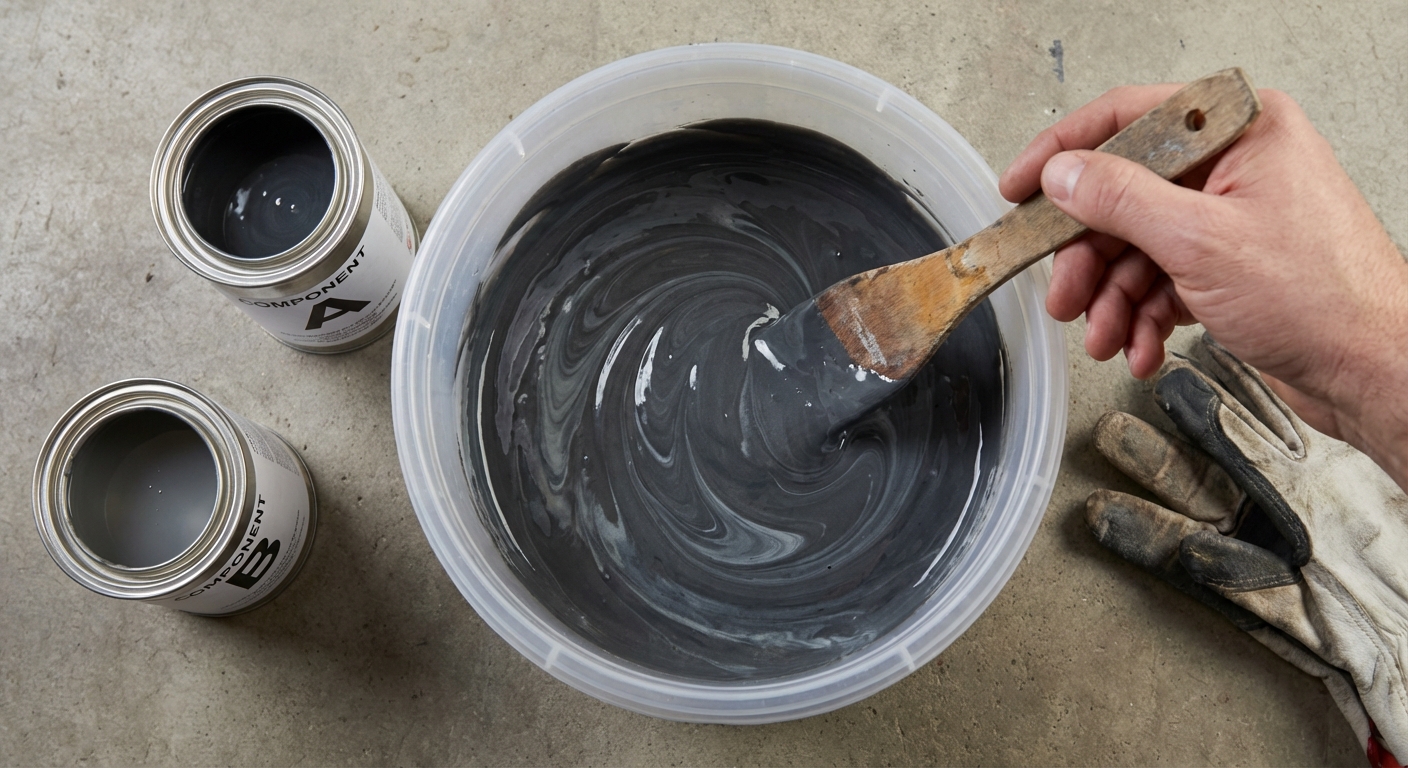
- Clean and abrade the tear.
- Apply a rapid-dry conditioner.
- Mix and pour the elastomer.
The best part? Using reinforcement tape within the polymer layer adds massive tensile strength with very little extra effort.
| Step Phase | Action | Time Estimate | |
|---|---|---|---|
| Phase 1 | Clean and Abrade | 15 Minutes | |
| Phase 2 | Condition and Mix | 10 Minutes | |
| Phase 3 | Apply and Level | 15 Minutes |
Standardizing these phases allows management to accurately predict downtime requirements for various repair sizes.
Is rubber conveyor belt repair sidewall better than vulcanizing?
A rubber conveyor belt repair sidewall using polymers is often superior for spot repairs because it avoids the “heat shock” that can weaken surrounding rubber during the vulcanizing process. Additionally, the cold-cure method eliminates the need for hot work permits in hazardous or explosive environments like coal mines.
Comparing speed and safety
Look, vulcanizing is great for splicing, but for sidewall gouges, it is overkill. The time it takes just to set up a vulcanizing press is often longer than the entire polymer repair process.
- No hot work permits required.
- Faster return-to-service time.
- Lower overall equipment costs.
Bottom line? You save money on labor and significantly reduce your operational risk.
| Feature | Polymeric Repair | Hot Vulcanizing | |
|---|---|---|---|
| Setup Time | 10-20 Minutes | 2-4 Hours | |
| Safety Risk | Low (Cold-Cure) | High (Heat/Pressure) | |
| Skill Level | Moderate | Specialist Required |
Choosing cold-cure polymers removes the risk of thermal degradation in the existing belt fabric during the repair cycle.
What is the cure time for rubber conveyor belt repair sidewall?
The cure time for a rubber conveyor belt repair sidewall is remarkably fast, with some high-performance elastomers reaching full mechanical strength in as little as 40 to 60 minutes. This speed is temperature-dependent, with warmer environments further accelerating the cross-linking process.
Understanding the cure cycle
Listen, you don’t have to wait 24 hours to turn the conveyor back on. Most systems are “touch-dry” within minutes and ready for full load-bearing service before the end of a standard lunch break.
- 15 minutes: Initial set.
- 60 minutes: Mechanical loading ready.
- Full chemical cure: 24 hours (usually unnecessary for restart).
Check this out: at 86°F (30°C), the return-to-service window is at its most efficient for emergency fixes.
| Temperature | Set Time | Full Service Ready | |
|---|---|---|---|
| 50°F (10°C) | 30 Minutes | 2 Hours | |
| 68°F (20°C) | 20 Minutes | 90 Minutes | |
| 86°F (30°C) | 10 Minutes | 40 Minutes |
Fast cure rates are essential for minimizing the total cost of ownership by reducing expensive system idle time.
How to ensure a lasting rubber conveyor belt repair sidewall?

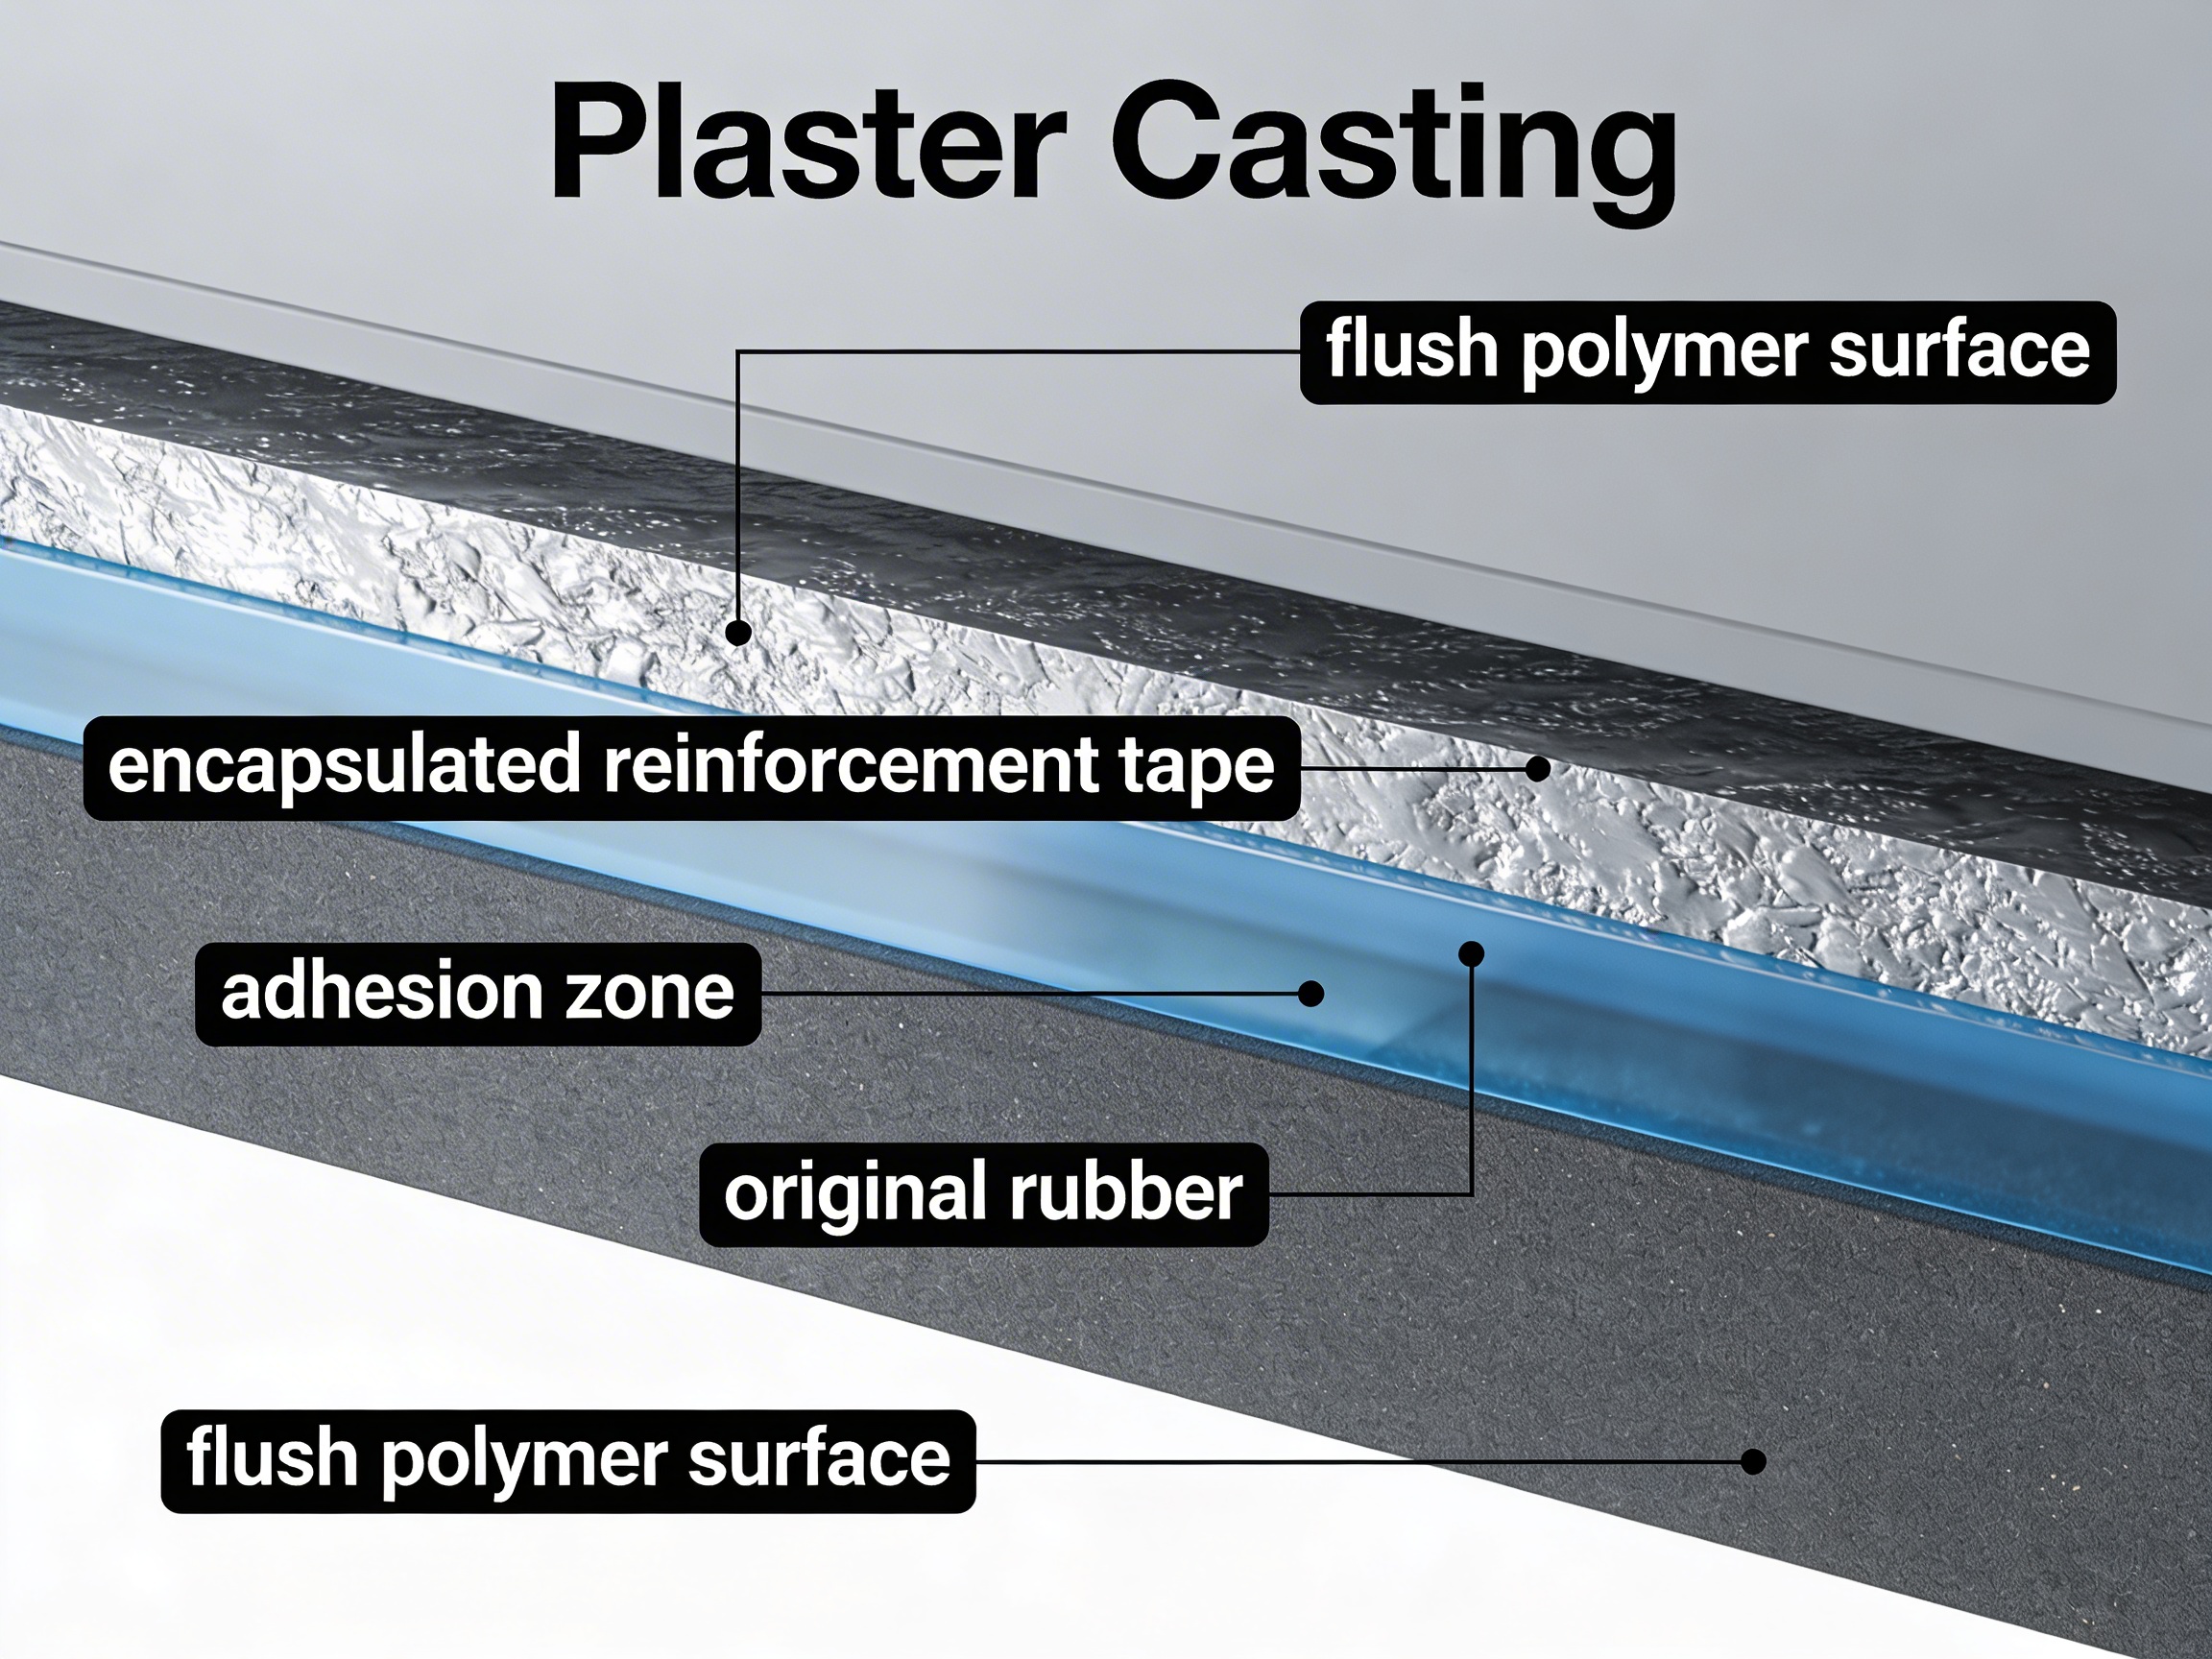
To ensure a lasting rubber conveyor belt repair sidewall, you must prioritize the “woolly” finish during abrasion and ensure the reinforcement tape is fully encapsulated within the polymer. The tape acts like rebar in concrete, providing the lateral strength needed to resist the stresses of the conveyor’s curvature.
Ensuring long-term durability
Think about it: the bond is only as strong as the surface it clings to. If the rubber is smooth or oily, the polymer will eventually peel, so thorough degreasing and roughing are non-negotiable.
- Use high-quality reinforcement tape.
- Avoid trapped air bubbles during pouring.
- Clean with industrial-grade solvents.
Wait, there’s more: always finish the repair flush with the belt surface to prevent scrapers from catching the edge and peeling it up.
| Durability Factor | Best Practice | Failure Risk | |
|---|---|---|---|
| Surface Texture | Woolly/Rough Finish | Adhesive Peeling | |
| Cleanliness | Zero Oil/Dust | Poor Chemical Bond | |
| Edge Finish | Flush with Belt | Scraper Snagging |
A flush, rough-bonded repair ensures the patch survives the high-friction environment of conveyor scrapers and discharge chutes.
Frequently Asked Questions
Can I perform a repair while the belt is under tension?Yes, you can perform these repairs in-situ while the belt is on the conveyor, though the area must be stationary and free from active vibration.
What’s the best way to fix a rip that goes all the way through?The best way is to tape the underside of the tear first, then apply the polymer and reinforcement tape from the top side to create a full-thickness plug.
Can these polymers be used on food-grade belts?Some formulations are specifically designed for food contact, but you must check the specific safety data sheet for compliance with regional health standards.
Is it possible to repair a belt in freezing temperatures?Yes, but you will need to pre-heat the belt surface with a heat lamp to ensure the polymer flows correctly and cures within a reasonable timeframe.
How long does a typical polymer repair last?When applied correctly, these repairs often last for the remaining life of the conveyor belt, showing similar wear patterns to the original rubber.
Conclusion
Repairing your system’s sidewall doesn’t have to be a multi-day ordeal involving outside contractors and expensive equipment. By utilizing advanced elastomeric polymers and the plaster casting technique, you can restore structural integrity and abrasion resistance in less than an hour. This proactive approach saves your facility from the massive costs of belt replacement and unplanned downtime. To find the right materials or get professional guidance for your specific application, contact us today to speak with an engineering expert.